
How to use Install Check Tool
Overview
Section titled “Overview”The aim:
- Deliver faster onsite device installation diagnostics
- Minimise return visits to resolve device installation issues
- Ensure correct installation and commissioning of sites
Note that Solar Analytics will no longer be accepting new WW registrations from 1 July 2026, with the WW service being fully retired and no longer available for new registrations effective 30 September 2026; however, existing Wattwatcher integrated sites will continue to be able to renew their subscriptions as normal.
The Install Check is part of Step 4 of the site registration process. This means a check via the Install Check or a phone call is required before commissioning a site.
This document below describe the process steps behind the Install Check.
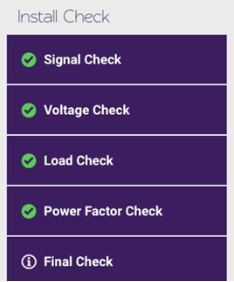
- Signal Check
- Device channel assignments and calibration
- Voltage Check
- Load Check
- Power Factor Check
- Final Check
- Add multiple devices
Step 4 (Hardware and Install Check)
Section titled “Step 4 (Hardware and Install Check)”After the pre-registration steps 1 ,2 ,3 , you will need to enter the first device’s serial number in Step 4 .
Once the serial number is entered, click “Connect” to begin the first installation check –> Signal Check.
Signal Check
Section titled “Signal Check”The signal check is designed to ensure that adequate signal strength is available at installation and prevent future communication faults .
If a signal is not present, the device cannot send over any data and hence, cannot be attached to the site. In this instance please:
- Check that the device is powered on
- Check the signal in the area with your phone
- Before reaching out to our support team please check the below so that you can inform the support team about what actions have been done:
If signal strength is present but inadequate (<-100dBm 4G), it is recommended to install an external high gain antenna to ensure device communications are reliable for ongoing operation. Once an external antenna is installed and while you are still on the Signal Check step, you may rerun the Signal Check test to confirm that the issue is resolved.
If you have installed a HGA but still failing signal check. Please check the following:
-
Ensure the transmitter is placed in an outdoor, unobstructed area at the highest possible point—ideally on the rooftop.
-
Position the transmitter vertically, facing upward and toward the nearest 4G or mobile tower, if possible.
If all of the above have been checked and signal check still fails, and if you bring a spare device, please decommission the current device and use the spare device and re-run install check.
Otherwise, when all fails, please contact here and request for a bigger antenna or longer cable extension
If signal strength is present and adequate (>-100dBm 4G), you will be taken to the next step Device and calibration channel assignments
Device and calibration channel assignments
Section titled “Device and calibration channel assignments”Here, we have introduced an easier way for installers to set the appropriate assignment of each channel / current transformer (CT) and its calibration value. The current calibration value of each channel / CT of the device is displayed and you are able to edit the values accordingly.
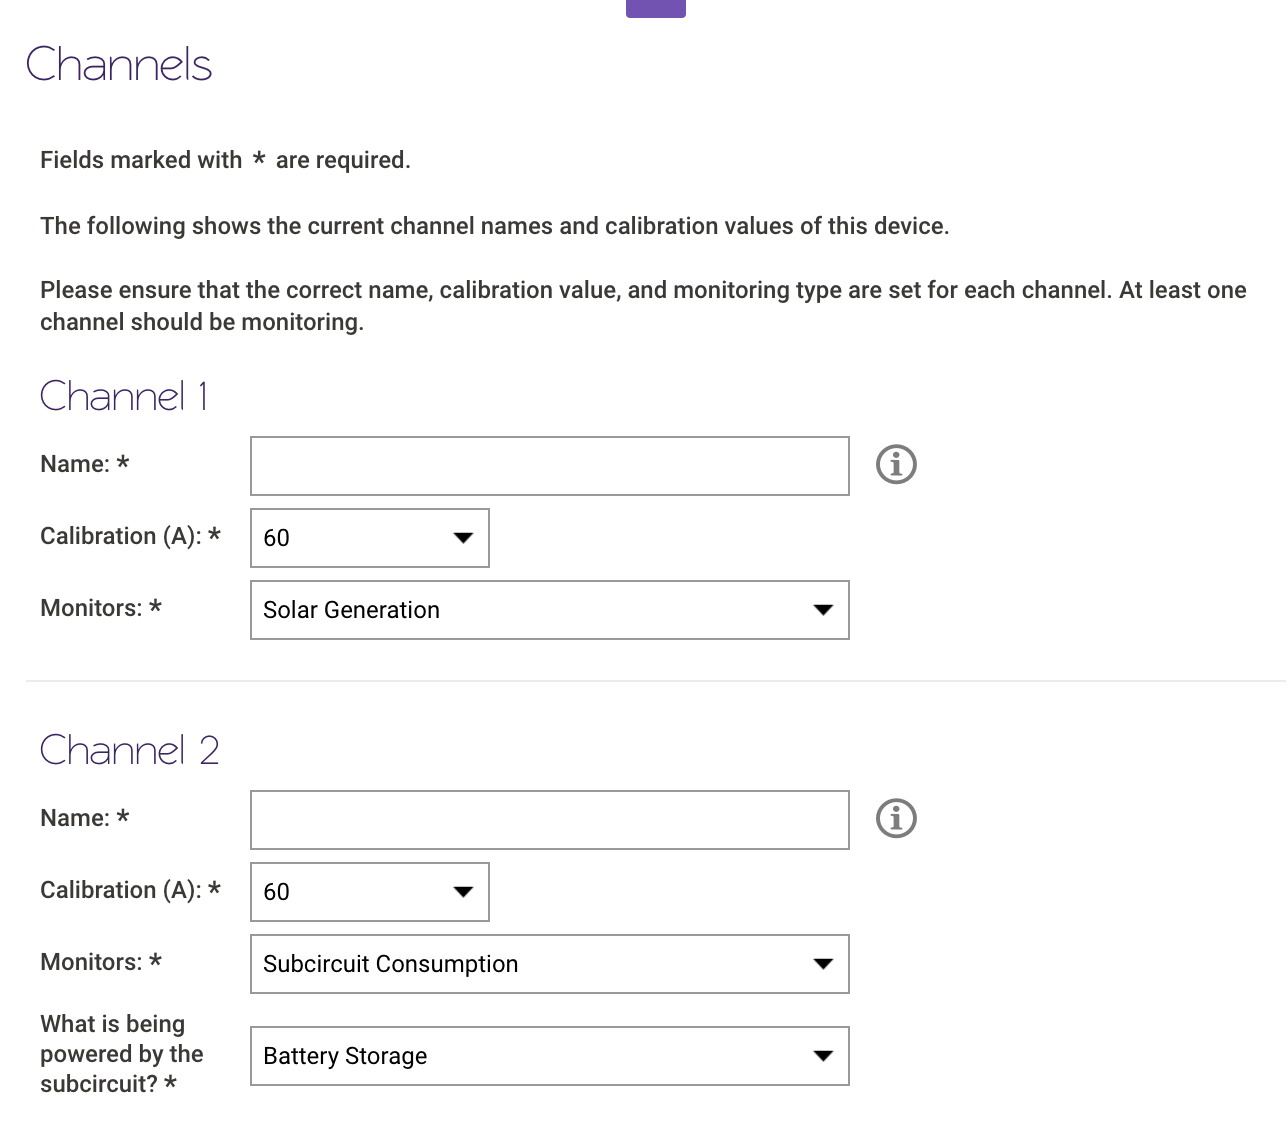
Once all the channel details are assigned and calibrated correctly, click “Save” to begin the second installation check -> Voltage Check.
Voltage Check
Section titled “Voltage Check”The voltage check is designed to ensure the correct voltage is present at the device terminals. It automatically detects if there voltage supply has been powered correctly (P1, P2, P3 connected).
If there is an error, please:
- Ensure P1, P2, P3 have been connected before you can proceed.
- Contact Solar Analytics Support If you have purchased your Solar Analytics monitoring device prior to March 2019.Your monitoring device may require a firmware update.
It is vital that we ensure power and firmware are correct to monitor the site correctly and reliably. Thus, you will not be able to proceed without these steps resolved.
If there is no error and the Voltage Check passes, you will be taken to the next step -> Load Check
Load Check
Section titled “Load Check”The load check is designed to detect circuit power to ensure that CT’s are correctly installed , and all channels are reading correctly.
NOTE: The load check requires the whole site mains and the PV inverter to be turned on so that the loads can be measured. Sub-circuits may be bypassed if it cannot be energised and as a result we cannot guarantee correct installation.
In the off chance that the net consumption matches the solar output (net consumption = 0), you may need to turn off the inverter.
If there is an error:
- Please check the connection of the CTs at the terminal block
- Please check the cable the CT is clamped onto is what is labelled
- For mains and solar, please ensure there is some load on the circuit
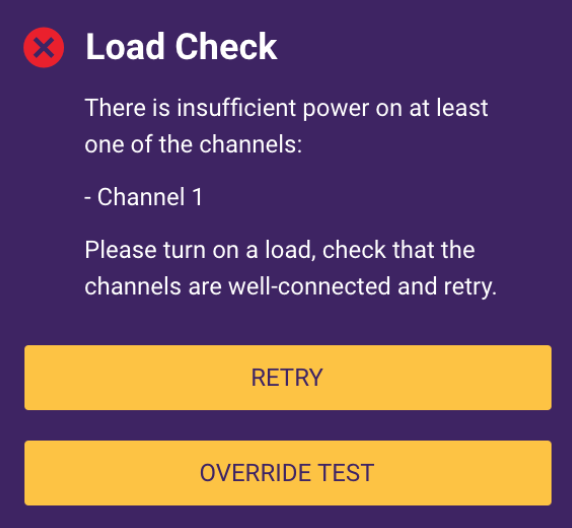
If you are still experiencing issues and after 3 retries, please contact our support team to assist in debugging and resolving the issue further with you while you are on site.
Installers also have the option of bypassing the check after 3 retries:
If there is no error on any of the device’s channel and the Load check passes, you will be taken to the next step -> Power Factor Check
Power Factor Check
Section titled “Power Factor Check”The Power Factor check is designed to ensure phase rotation is correct, by utilising Power Factor as a proxy.
For single phase sites,
Section titled “For single phase sites,”The Install Check will automatically bypass the Power Factor test and lead you to the final step -> Final Check.
If an error or alert occurs for:
- Solar
- The detected power factor is <0.85. Please check that the CT phase matches the phase at the voltage reference. Check the wiring diagram attached to understand how to wire the device up
- Please check that the power measured by the Solar Analytics monitoring matches what the inverter is producing.
- If you still experience an issue after 3 retries, please contact our support team to assist in debugging and resolving the issue with you while you are on site.
- Consumption or sub-circuits
- Please be certain that the CT phase matches the phase at the voltage reference. Check the wiring diagram here to understand how to wire the device up
- The power factors will be provided for your reference and guidance
- You may click proceed to acknowledge that the non-solar CTs are installed correctly.
**Note:**After 3 retries these checks may also be skipped.
By clicking “proceed”, you will be taken to the next step -> Final Check
Final Check
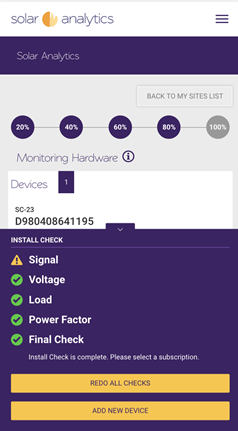
Section titled “Final Check”The Final Check is designed to confirm all changes have been successfully applied and the device is operating as expected. This step is also where you can add an additional devices to this site before running the Final Check, if there are more than one device installed on site.
During this step, you will be required to turn off the inverter as an important part of the diagnostic process and enable us to determine that other reference power measurements are correct.

To utilise this tool efficiently and to reach this goal together, we recommend the following best practice for all installers and resellers.
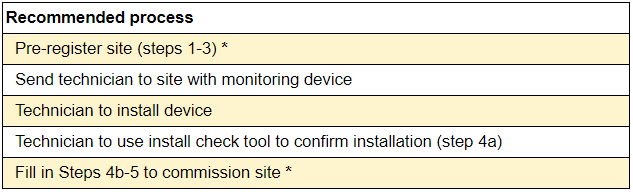
*office admins or installers can complete this step
How to add multiple devices onto the same site?
Section titled “How to add multiple devices onto the same site?”To add a new device onto the same site, simply click on the ‘Add new device’ button displayed on the final check stage. A screenshot of what it looks like can be found below.