

Pylon site commissioning guide
Download the guide as a PDF or view the instructions below.
Before you get started, you’ll need:
Section titled “Before you get started, you’ll need:”- A Solar Analytics Fleet login (if you don’t already have a Fleet account, please click Contact Us button below for free fleet creation)
- A Pylon Observer account login (if you don’t already have an account, go to https://app.getpylon.com/register/ for a free trial account)
- Authorised connection from Pylon Observer to Solar Analytics (in Pylon Observer, navigate to Settings -> Integrations -> Solar Analytics. Enter your Solar Analytics username & password and click Connect)
- Each unique Pylon Observer user in your organisation will need to authorise the connection to Solar Analytics (once only)
Pylon Integration.png Integrated flow
Section titled “Pylon Integration.png Integrated flow”STEP 1: Commission and share with Solar Analytics
Section titled “STEP 1: Commission and share with Solar Analytics”- Commission site as normal in iSolarCloud/SolarWeb/SEMS
- Share the commissioned site with Solar Analytics through the site sharing process - adding sungrow/fronius/goodwe @solaranalytics.com
Support pages:
- Sungrow site sharing - Solar Analytics Support
- Fronius site sharing - Solar Analytics Support
- Goodwe site sharing - Solar Analytics Support
STEP 2: Share site with Solar Analytics from Pylon
Section titled “STEP 2: Share site with Solar Analytics from Pylon”- In Pylon Observer, navigate to the desired system design
- Click the three dots in top right corner and select Sync with Solar Analytics
- Select the desired design and click Create site in Solar Analytics
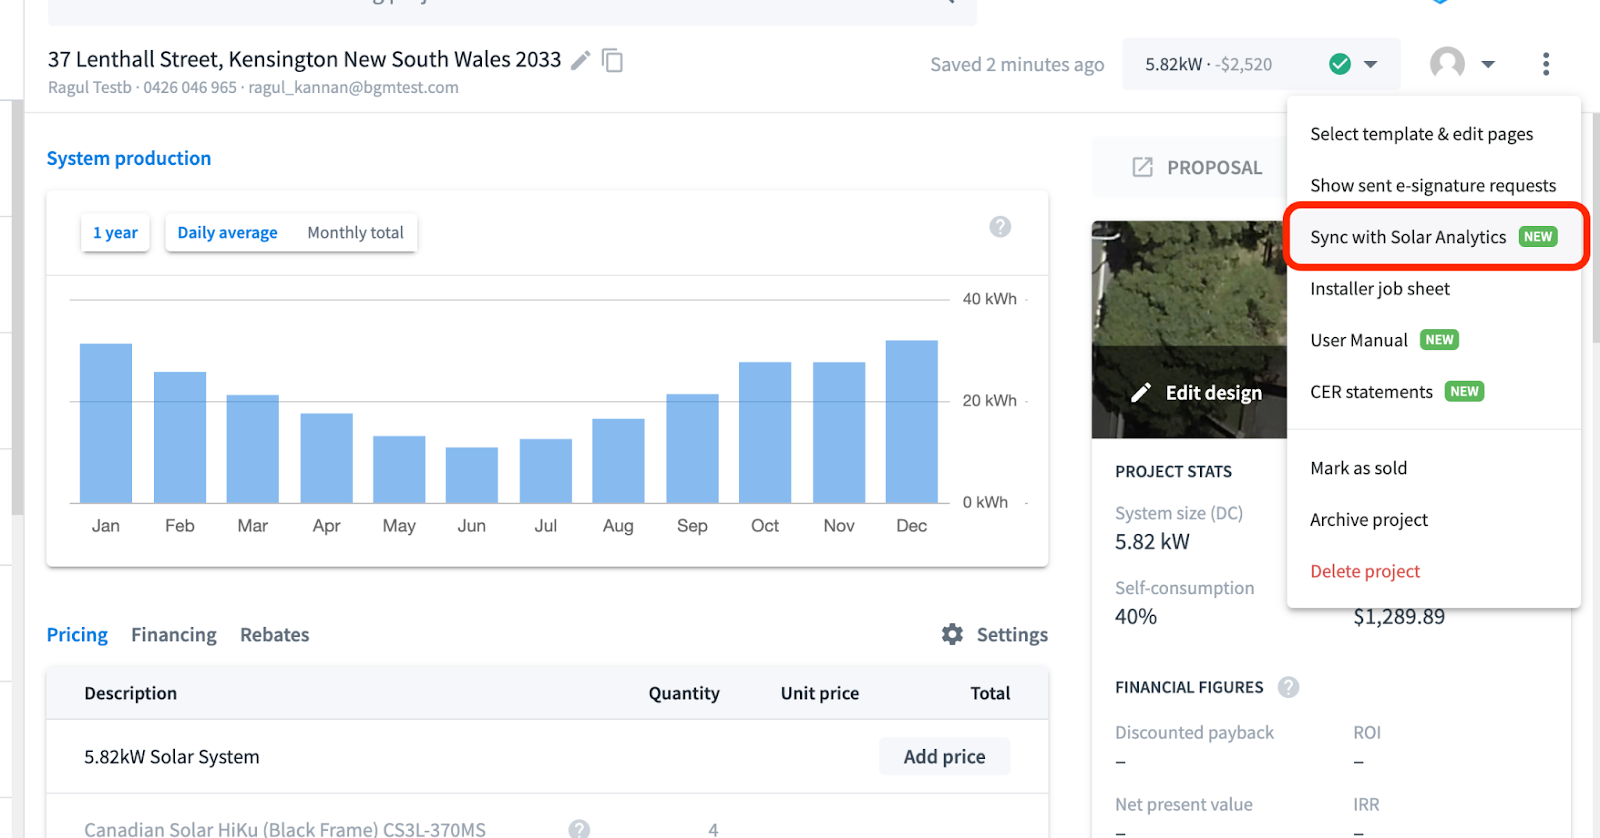
Image showing Pylon Observer interface STEP 3: Commission site on Solar Analytics
Section titled “Image showing Pylon Observer interface STEP 3: Commission site on Solar Analytics”
- In Pylon, click Open site, whichredirects to the Solar Analytics dashboard. OR from Solar Analytics, click Pending site.
- Select the hardware type - Inverter (Integrated)
- Confirm the pre-filled details, add the inverter serial number, continue and complete site commissioning.
- Select subscription
Note that it may take up to five minutes for the site to be connected to Solar Analytics.
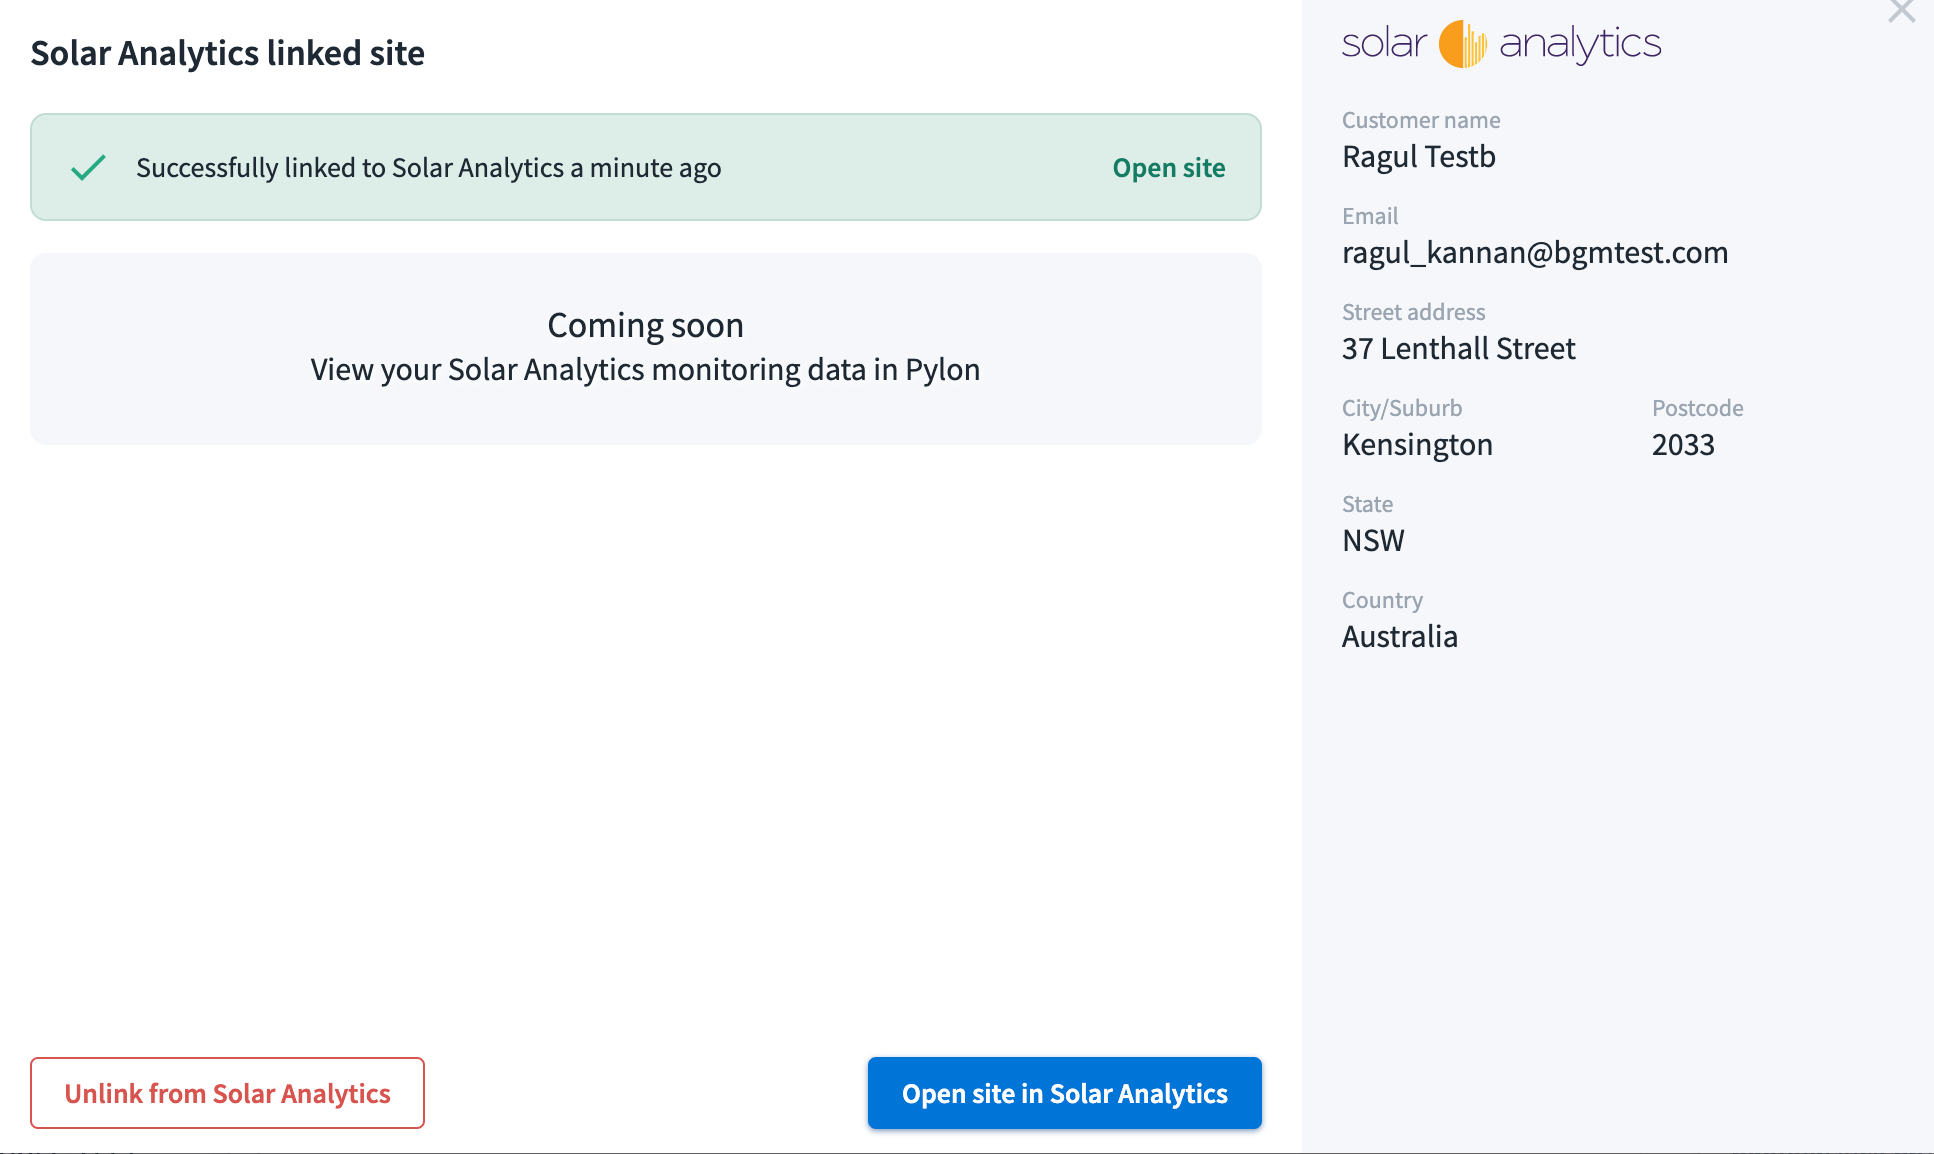
Classic flow
Section titled “Classic flow”STEP 1: Share site with Solar Analytics from Pylon
Section titled “STEP 1: Share site with Solar Analytics from Pylon”- In Pylon, navigate to the desired site and click three dots
- Click Sync with Solar Analytics
- Select the desired design and click Create site in Solar Analytics
The site will be created under the pending list on your Solar Analytics fleet dashboard
STEP 2: Install Solar Smart Monitor - (KR-63) and commission Solar Analytics
Section titled “STEP 2: Install Solar Smart Monitor - (KR-63) and commission Solar Analytics”- Install Solar Analytics hardware with desired channel allocation.
- In the Solar Analytics dashboard, Click EDIT on the desired site from the pending list.
- Confirm the pre-filled details, go through the Install Check Tool for device installation, and complete site commissioning.
© 2026 CATCH Power & Solar Analytics